Forex MT4/MT5 Indicators Forex Indicators Download
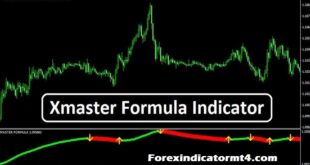
Supply & Demand Indicator is world best indicator for making money online trading market. you’re likely aware that the fluid balance between buyers and sellers is the driving force behind all price fluctuations in the Forex market.
By default, the MT4 terminal lacks an indicator capable of identifying zones where significant shifts in this balance occur.
This will help you to identify market trend for buy sell trades. This is where we recommend Technical Indicator exploring the Shved Supply & Demand indicator a free tool developed to automatically detect and draw such critical levels.
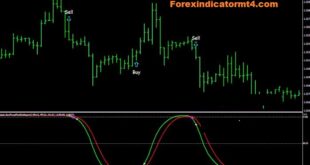
Shved Supply and Demand indicator MT4
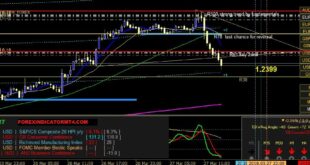
The indicator conveniently provides brief text descriptions of all chart formations, ensuring that you can easily understand the highlighted levels. Supply and demand zones represent areas of heightened trading activity within the Forex market.

These levels are established based on zones Support & Resistance Zones where significant, targeted price movements have previously occurred. These zones are of particular interest because repeated price interactions within them can signal potentially profitable entry points for trades.
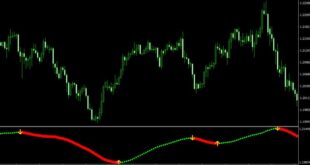
MT4 Premium Indicator Shved Supply and Demand Chart Setting
Lower timeframes often exhibit more market noise. The height of these zones is determined by the level of price activity in their vicinity. If these zones have frequently piqued the interest of traders and have resulted in price movement, they will be visibly more pronounced.

Back Limit – selects Chart Indicator the number of candlesticks
Pus 1
Zone show weak – enables/disables Zone
Zone show untested – enables/disables Level
Zone show turncoat – enables/disables displaying Pattern
Zone fuzzfactor – Choice Height of supply and demand zones.
Pus 2
Fractals show – enables/disables Show fractals Live Chart.
Fractal fast factor – Choice fast factor algorithm Indicator.
Fractal slow factor – Choice slow factor fractals.
Pus 3
Zone solid – sets zones.
Zone line width – sets the thickness necessary price zones.
Zone style – sets price zones.
Zone show info – enables/disables displaying Zone Supply and demand Indicator.
Zone label shift – sets the offset
Zone merge – enables/disables Level.
Zone extend – enables/disables .
Pus 4
Zone show alerts – enables/disables notifications Zone Alert indicator.
Zone alert popups – enables/disables pop-up notifications Live Chart MT4.
Zone alert sounds – enables/disables sound Alert notifications
Zone alert wait seconds – Choice Delay time for notifications

Pus 5
Text size – text size settings chart.
Text font – Font size setting.
Text color – text color setting.
Sup name – set name of support zones.
Res name – Check name of resistance zones.
Test name – Choice the name of retested level.
Color support weak – color of weak support zones set.
Color support untested – color of untested support zones Indicator.
Color support verified – support levels Color.
Color support proven – color of repeatedly tested.
Color support turncoat – color of “mirror” (turncoat)
Color resist weak – color of weak resistance levels indicator chart mt5.
Color resist untested –Color of untested resistance levels.
Color resist verified – color of tested (verified) resistance zones.
Color resist proven – color of repeatedly tested (proven) resistance zones.
Color resist turncoat – Color of the “mirror” (turncoat) resistance levels.

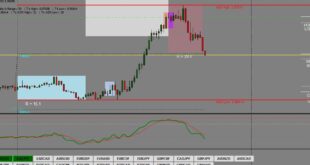
Like many Forex market indicators, Shved Supply and Demand provides more reliable signals when applied to higher timeframes. It’s essential to consider that the more frequently the price has tested supply and demand zones, the more relevant they tend to be.
Types of Zones Identified by the Shved Supply & Demand Indicator
This indicator categorizes levels into five distinct types:

- Weak Zone: These are zones where there is no substantial excess of demand or supply nearby. Accordingly, traders should either avoid trading near them or approach such trades with caution.
- Untested Zone: These are zones that have not yet been retested. They include supply and demand zones from which significant and targeted price movements have occurred in the past.
- Verified Zone: These are levels that have been tested, or verified, more than once.
- The indicator indicates the number of retests Non-Repaint Arrow on the chart. The higher the number of retests, the stronger the zone.
- Proven Zone: These are levels where trading activity almost invariably resumes, often leading to a change in trend direction, even to the point where the level is breached, and the trend reverses.
- Turncoat Zone: These so-called ‘mirror’ levels initially act as resistance or support. However, due to shifts in supply and demand Accurate Stock Indicator these levels are eventually breached, leading to trading in the opposite direction.
- Practical Examples of How to Use the Shved Supply & Demand Indicator When applying this indicator, you can adopt two primary approaches: trading in alignment with the prevailing trend and trading during a change in trend direction.